Even if you consider your riding skills to be somewhere around expert level, that doesn’t mean you can ignore performing safety checks on your bike. In fact, an experienced motorcyclist will check their bike before every ride, ensuring they get to where they’re going quickly and safely. Breakdowns are one concern, although mechanical failures mid-ride are far more worrying. If you’re ever in doubt as to how safe your bike is then don’t take it out on the road until you’ve corrected whatever issue you found.
Why Perform A Pre-Ride Check?
If you ride your bike every day then the wear and tear on it can be invisible, even if it’s quite serious. Equally, if you only ride every few days or weeks a ride pre-check is just as important. The vibration of riding your bike every day can work nuts, screws and cables loose, and corrosion or debris can also become an issue if you don’t resolve them. Staying safe is the best way to enjoy riding your motorcycle, and pre-ride checks are the single best way for you to achieve this. Plus, it only takes a few minutes to check your bike properly – it’s not rocket science.
Chain
Check that your chain tension is correct before you leave your driveway. All you’re looking for is the correct amount of play in your chain, which should be about 1-inch upwards or downwards when lifted or pressed with your hand. If your chain fails when you’re riding it could cause a serious accident, potentially resulting in serious injury to your legs. You also run the risk of causing permanent damage to your bike. Check that your front and rear sprocket are also free of any signs of damage, including broken teeth.
Bike Frame
Look for signs of damage, or any trapped debris near the chain or brake discs/calipers. Remove your saddle and check for signs of corrosion, or any physical damage to the frame itself. While inspecting the frame you should also ensure your suspension is adjusted properly – you can test this by replacing the saddle, sitting on your bike, and making a rocking motion. The response should feel firm, but comfortable. Any extra spring in the rebound might indicate an issue with the preload setting on your suspension, which is something your mechanic should take a look at. You can also check for leaking oil or brake fluid when you’re checking the frame, while also checking your centerstand and kickstand.
Lights
If your lights aren’t functioning properly, including your DRLs, then you run the risk of becoming “invisible” in traffic. Check that your signal lights work, and that your brake light comes on when you press the brake pedal, or pull the brake lever. High and low beams should also be tested to make sure they’re working properly. Your emergency roadside bike repair kit should include replacement headlight and signal bulbs.
Tires
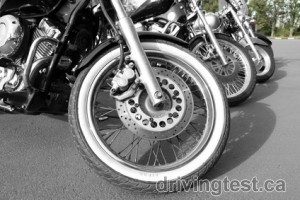
Your tires keep you upright on the road, so never take your bike out for a ride without checking the integrity of them, and the rims too. Your tire pressure will drop over time, which can and will affect the performance and handling of your bike. Incorrect tire pressure can also cause uneven wearing of your tires, resulting in additional handling problems and expense. Check your owner’s manual for the correct tire pressure – factoring in whether or not you’re a 1-up or 2-up rider. Then adjust it accordingly at least once per week, and before any long distance driving. Check for debris, and sharp objects which might lead to a puncture. Also check that you have at least 1/16th of an inch of tread left – any less can result in a loss of control when cornering, or during an emergency stop.
When checking your wheel rims ensure they’re free of dings, and pay particular attention for any signs of physical damage, like a crack in the rim itself. If your rims are damaged you should replace them before attempting to ride your bike again.
Controls
Check that your brake lever, brake pedal, throttle, clutch and steering column are all working properly. Anything connected by cables or levers should move freely when tested. With your bike on its center stand, or a paddock stand, ensure that your wheels turn freely without the brakes applied, but also when you apply the brakes that the braking motion is smooth and controlled. Scraping sounds indicate worn brake pads, and if the wheels don’t move freely without the brakes applied it can indicate that your brake caliper has seized.
Oil and other fluids
The last thing you want is a seized or overheating engine, so perform visual checks on your oil level before any ride. If in doubt do a dip test on it to ensure you have enough oil. Regular oil changes can help identify issues with your engine, so pay attention to any vapor appearing in the oil window on your engine casing. Visually check your brake fluid reservoirs, which are located on your handlebars, and check the rear brake reservoir too. Coolant levels should also be visually inspected. Finally make sure you have enough gas for your journey, ensuring that there’s no sign of water leaking into the fuel tank via your filler cap.
So if you want to avoid fines, and the potential for nasty accidents, always perform a pre-ride check on your bike before heading out onto the roads or highways near you.